Using krita to generate a normal map from a simple drawing is very easy
We will use a Normal Map created in Krita to add relief to a plane, in Blender. It will be usefull for our 3D animations, or video games. We mainly have 2 options to create relief :
- use a mesh plenty of vertex
- use textures.
The use of a normal map is based on the texture. The Krita filter analyses edges et applies a lighting simulations relative to edge detection tangent. This results in a special bluish image in which colors represent light incidence. In our sample, we will use a simple wikipedia black image associated to a textured material get from CC0texture.
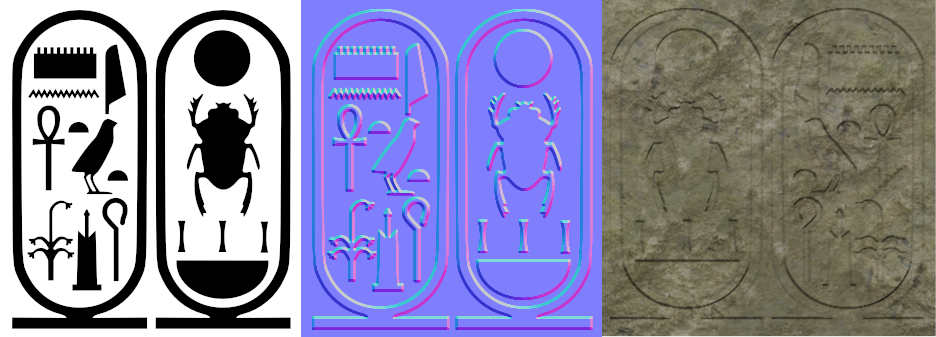
In Blender, our rock material will be the entry of Color socket, and normal map texture will be the entry of the normal map with a normal map node in between.
- Open the drawing in Krita, If it’s a SVG set resolution.
- If the drawing is near the edges of the canvas, increase its size using for example Crop tool with Grow option set.
- In the Layer window, let’s choose Filter Mask
- Then Height to Normal Map in Edge Detection
- Prewitt will give the strongest effect
- For our image in based on black and alpha, choose Alpha to ease edge detection
- Eventually set the width
- And export to png, jpg, or exr
- At last, use the map freely.
Of cours, this isn’t a real relief, but what is real in a computer ? This is really practical to use normal map in games, but in movies too, because it makes renders much faster than using meshes. This is an ideal toolbox for 3D artist, game artist and game designer.
How to create a normal map in Krita
How to create a normal map in Krita
published 9 juillet 2020, updated in